Women's Leather Wallet Design Process
An Inside Look At How We Designed New Women's Leather Wallets
This post covers my process for designing a new product: a women's leather wallet. I discuss how I went from initial concept to finished item, and how I corrected issues I ran into along the way.
I haven't written a step by step guide for making this exact wallet. Rather, This blog is meant as an inside look into what goes on during the design process, and as an aid to anyone working on designing their own leather wallet. That said, all my steps are broadly covered in the “Revised Prototype” section in the second half of the post, and I explain how I arrived at my measurements.
Inspiration for the Women's Leather Wallet
I use these clutch-style wallets myself, so I began the design process by thinking about wallets I’ve had over the years. What features did I like and dislike about them, what did I find necessary and unnecessary? I also measured and examined the construction of the wallet I currently use.
Reducing bulk was going to be a major consideration for this project. I wanted the wallet to be as compact as possible, so it would easily fit most bags. The 2 1/2 oz goatskin I wanted to use for the interior was thicker than the vinyl and fabric interiors of my own wallet, and I knew that small amount of extra thickness would add up fast if too many leather layers were used. The outside of the wallet would be made from 3 - 4 oz premium tooling leather, which would make for a sturdy and durable product, but I would not want to use this for the interior because the wallet would become too bulky.
With that in mind, I decided to keep things simple. I designed the wallet as a rectangle, folded in half and secured with a clasp. All interior elements would attach to this rectangle, such that it would lay flat when opened. I wouldn’t use zippers or pouches or a median section. I also knew I wanted the card pockets to be horizontal, since cards stacked in a vertical column would overlap each other more, creating more thickness.
The Question of Pocket Size
I wanted to use the same pocket-stacking method we use in our men's wallets. The two upper pockets that you can see in the man's wallet below are not rectangular pieces of leather. Instead we cut them in a T shape, with two tabs at the upper corners. We sew the bottoms of the pockets to a backing piece, and later sew the side tabs to the body of the wallet. This keeps the bottom and sides of the wallet from being five layers thick.
I did not want my pockets to be the same size as those on the men's wallet. Those pockets are 4 1/8” wide, and I ideally wanted my wallet to be narrower than 8”. To find the smallest reasonable pocket size I could use, I made a test pocket. From this I knew that a 3 5/8” distance between seams would make a snug but usable pocket.
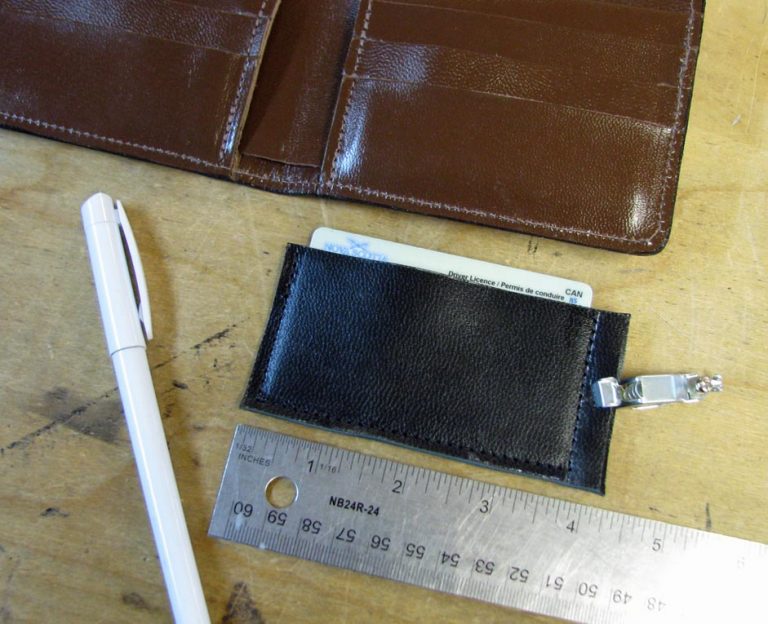
I made a test card pocket to check sizing.
The First Prototype
The picture below shows my first ideas for the layout and dimensions of the women's leather wallet. All these measurements changed quite a bit by the end.
After coming up with this plan, I realized we had cutters that might work well for the wallet exterior, and for two of the interior money pockets. By “cutters,” I mean the metal item you can see in the photo below. These are essentially heavy-duty cookie cutters which are custom made for us, which we use on a hydraulic press to cut out pieces for some of our products. When designing new products, we try to come up with new uses for existing cutters. Hand cutting pieces takes much longer, which means that fully hand-cut products are priced higher.
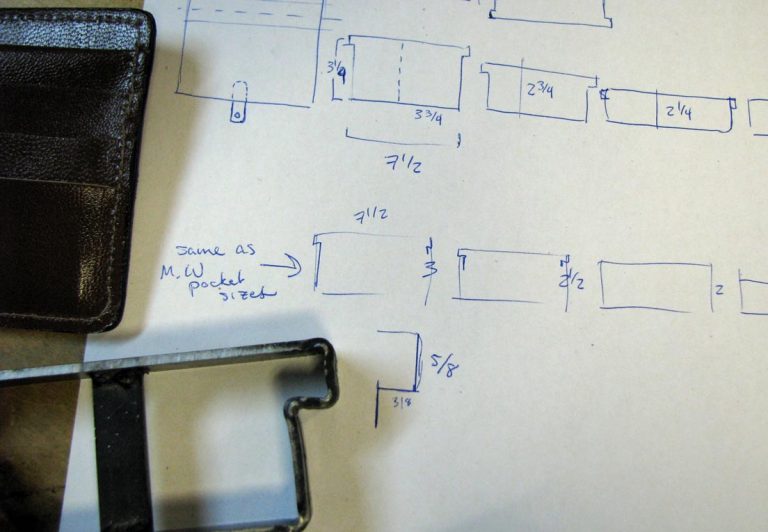
My initial ideas for the ladies leather wallet. Lower left is a cutter we use for our men's wallet.
The set of cutters I found had been designed for a checkbook cover. The length was slightly less than I’d wanted, and would result in the card pockets being a hair’s breadth narrower than my test pocket. Still, I decided to see how the wallet would turn out using those dimensions. I shortened the tab height from 5/8” to 1/2" on the card pockets, to make them more compact. I also set the second money pocket on the top flap 1/2” down from the one behind it, to match.
The wallet would look unfinished with a strip of bare tooling leather between the pockets, but I didn’t want to line the whole interior with goatskin because that would make the wallet significantly thicker. Instead I glued a strip of lining down the center, with wings extending underneath the pockets so that no tooling leather is visible.
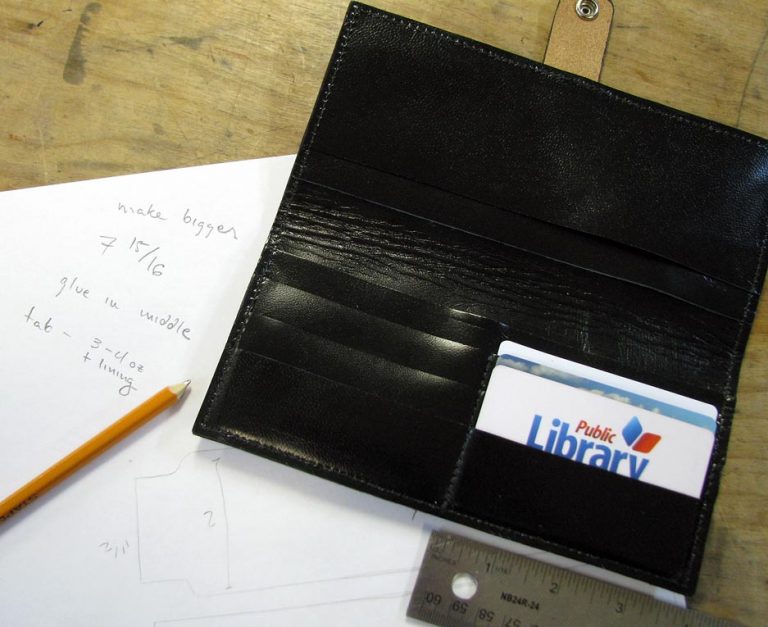
My first wallet, with ideas for improvement.
This was the end result. I was happy with the look and feel of the wallet, and with the size of the long money pockets. Unfortunately, the card pockets were too small. Once five of them were filled, getting a card in the sixth pocket was a struggle. Putting two cards in each pocket was nearly impossible. It also seemed that the bottom pocket should be taller, to enclose more of the card.
I made two other edits as well. Firstly I decided to line the inside of the closure tab, so the wallet would have no unfinished tooling leather visible. Secondly I decided to glue the central lining piece down completely, rather than leaving the wings inside the pockets loose. I had originally left them loose with the idea that money could be tucked under them, but I felt the lining was not secure enough that way.
Making The Revised Prototype
I hand cut new wallet pieces using my revised dimensions. Every time I adjusted a piece I recorded the measurements, so I would know what I’d done when it came time to make my final pattern.
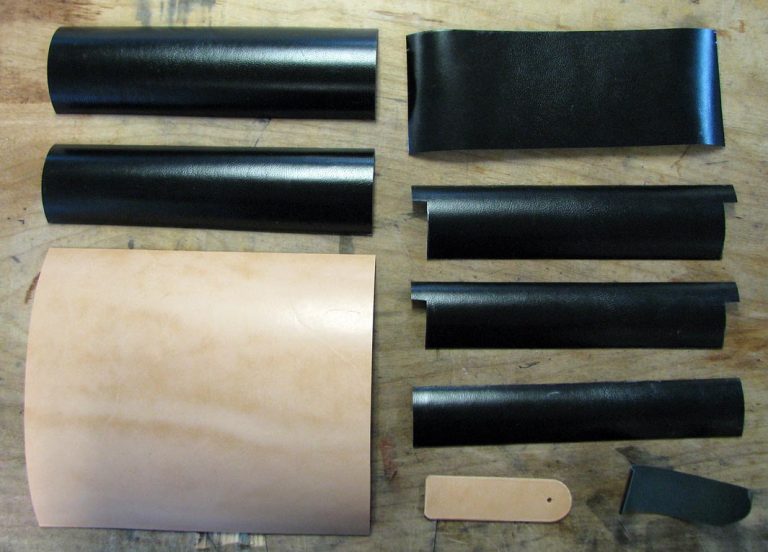
The cut pieces for my final women's wallet.
Finally, I assembled the wallet. I applied contact cement where needed to the interior pieces. While waiting for the glue to dry, I applied leather dye and neatsfoot oil to the exterior pieces and set them aside. Then I hammered my glued pieces together, and assembled the pockets.
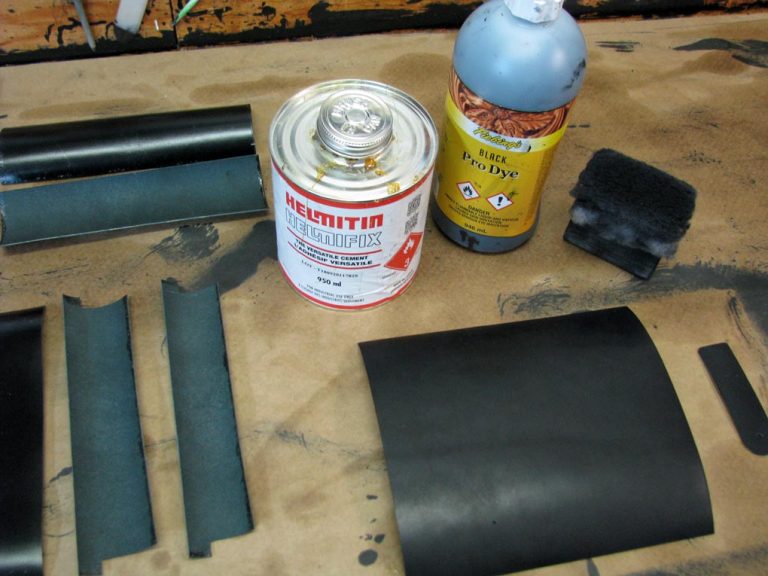
Dyeing and gluing the leather wallet pieces.
When the neatsfoot oil had fully soaked in and the exterior pieces were dry, I polished them with acrylic resolene and dyed the edges with edge-kote acrylic dye. Then I glued the tab top and the tab lining together, and trimmed the excess lining. I sewed around the edge of the tab only on the end where I wasn’t going to sew it to the wallet body. When doing this I made sure my seams would line up and look like one seam on the finished product.
I set the top line 2o small jacket snap, and worked out where to attach the tab and the bottom snap. Then I sewed on the tab, glued the interior pieces to the exterior, and sewed around the wallet's edge to permanently fix everything together.
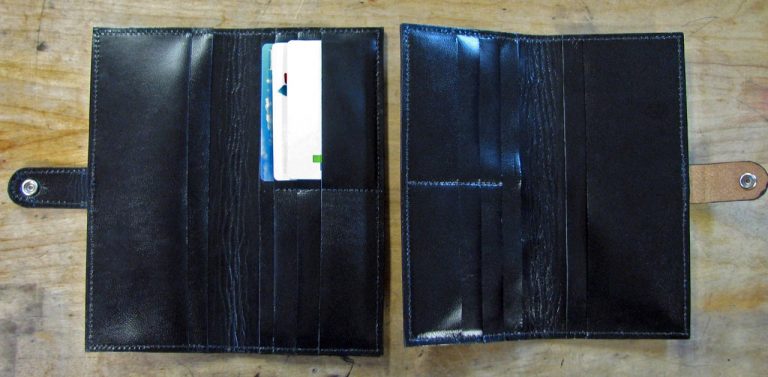
Card wallet pocket interiors of the two different designs.
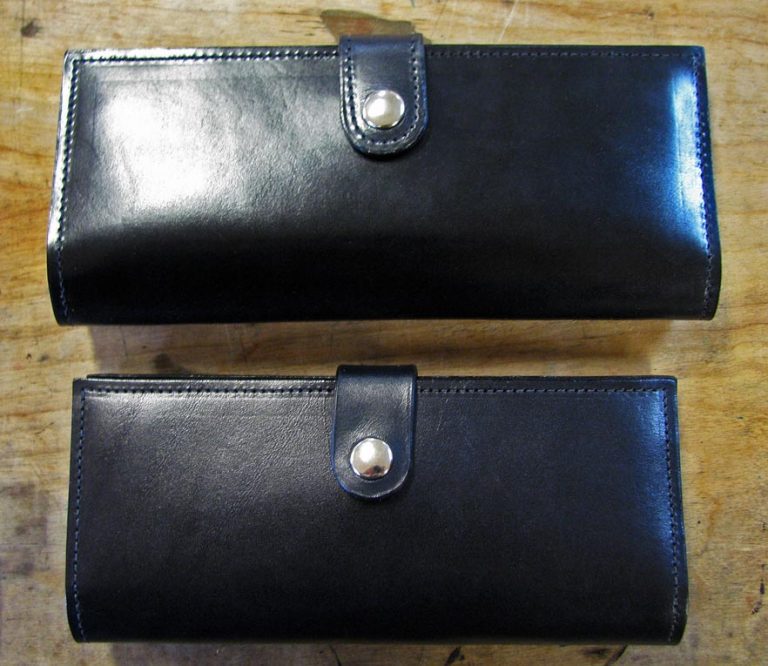
First prototype vs. final women's leather wallet.
Here you can see how the first version compares to the second. The card slots are now much easier to use. Each can fit two cards comfortably, but even with one card in each slot the cards are held securely and not in danger of sliding out. The added lining in the tab creates a more unified look.
Making a Pattern
Now that I had my finished wallet, I could make a pattern to use for future wallets. This was easy to do since I had kept records of my measurements.
The pattern has small holes indicating where to sew the tab and where to place the snaps. This way I can simply make a mark on the leather, rather than having to measure for correct placement every time.
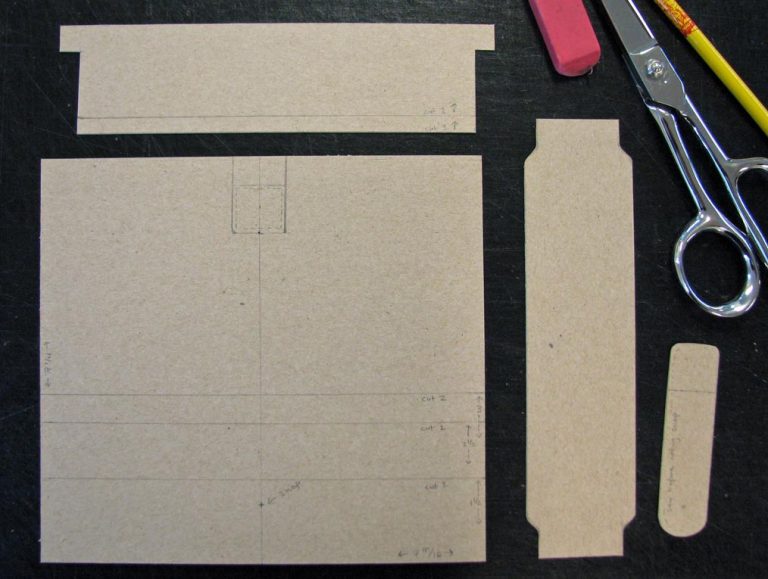
My final pattern for the women's leather wallet.
The Finished Women's Leather Wallet
This project took about three weeks to complete, from initial planning to the wallet's appearance on our online shop. I worked on it when I had time between making custom orders. Once I'd finished my part, the wallets I'd made went over to our photo studio with Jamie. He took glamour shots of them and then worked on adding the product to our website.
Check out our ladies leather wallets at our online store!
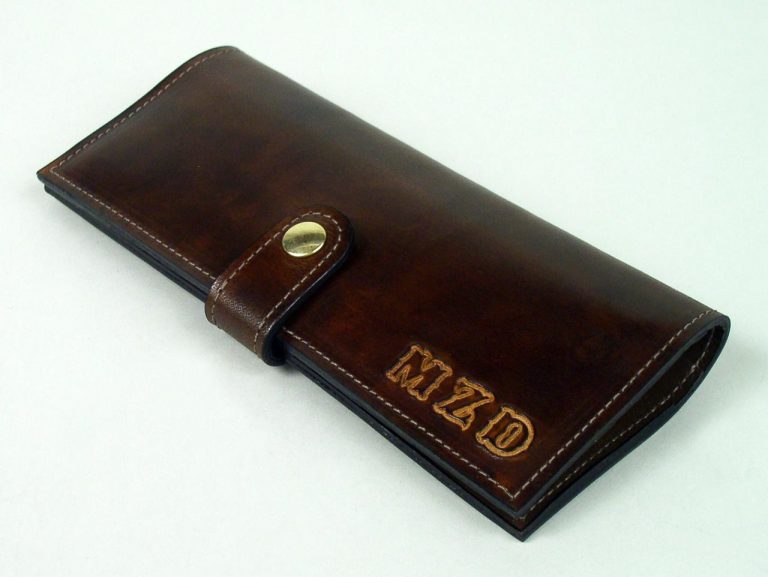
The first of our personalized women's leather wallet to leave our shop - this one traveled to Florida!


