Homemade DIY Leather Keychains
Homemade Leather Key Tags
This leather craft tutorial will teach you how to handmake etched and stamped DIY leather keychains like the ones below. Key tags are a good project for people just starting leather work: they're small, they aren't expensive, they don't take long, and they don't require too many supplies. Best of all it is easy to learn how to make keychains with the many ideas demonstrated.
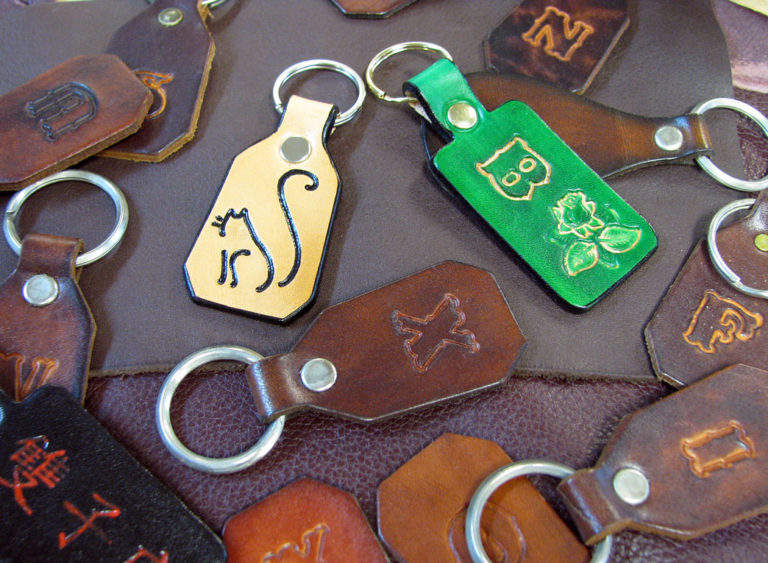
I'll take you through my process of making the etched cat key tag on the left and the stamped green key tag on the right.
Supplies Needed For DIY Leather Keychains
For this DIY Leather Keychain project you will need:
- A leather key fob piece. We sell key tag kits which include precut keychain blanks together with rivets and split metal key rings. If you’re making this project with kids or as a group activity, I recommend that option, because cutting the leather will be the most difficult step for a beginner.
If you’re cutting the tag shape yourself, you’ll need a piece of vegetable tanned leather. We use 7 oz tooling leather for our key tags, which means the leather is 7/64” thick. Anything from 6 to 9 oz vegetable tanned leather will work, depending on how firm you want your leather key fob.
I also recommend having some scrap leather or a few extra key tags on hand to practice your tooling techniques. You might be able to save money on leather by buying scrap pieces from a local leather shop or craft shop. We currently sell our scrap leather to local customers by the grocery store size bag for a small amount of money. The pieces are too small for belts and guitar straps, but plenty big enough for key tags and other small projects.
- A sharp utility knife to cut out the tag. Make sure you have a fresh blade, as this will make getting a smooth cut much easier.
- A round drive punch or other punching tool to make holes for the rivets. For more info on how to punch holes in leather, see our blog post on how to punch holes in leather.
- One medium rapid rivet or one medium double cap rivet.
- One split key ring.
- Supplies to decorate and finish the key ring. This might include stamping tools, etching tools, leather dye, acrylic resolene polish, edge kote and / or leather paints.
I’m going to cover a lot of options for key tag decorating. You can pick and choose based on your preferences and what supplies you have available. For example, I’ll include instructions for dyeing and polishing your tag, but you can also choose to leave it the natural leather color.
Cutting Your Leather Key Tag
If you aren’t starting with a key tag kit, you’ll need to draw a pattern for your tag shape. You can draw the pattern directly onto the leather in pencil, or cut a template out of paper or card stock and trace it onto the leather.
The easiest leather key tag to cut is a simple rectangular strip, like the tags below, which are 5” by 5/8”.
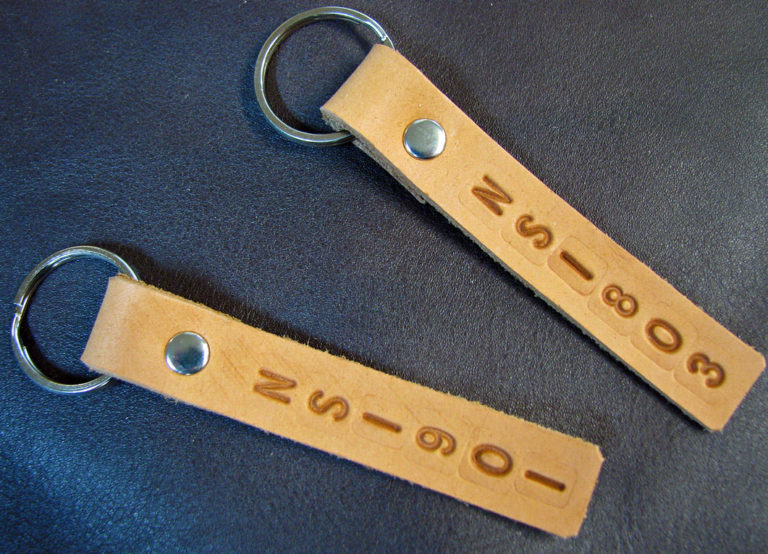
We made these simple rectangular numbered key tags from leather for vehicle registry numbers and hotel room numbers.
Any shape can become a key tag, as long as it has a tail for securing the key ring. Below you can see our standard key tag shapes. Our standard round tags are 2" in diameter, and our standard rectangular tags are 2 1/2" by 1 1/2". On all our tags, we space the rivet holes 1 5/8” apart.
If you’re confident cutting leather, you can get more creative with various shapes of your DIY leather keychains. The most intricate custom key tag I’ve made for a customer was in the shape of an acoustic guitar.
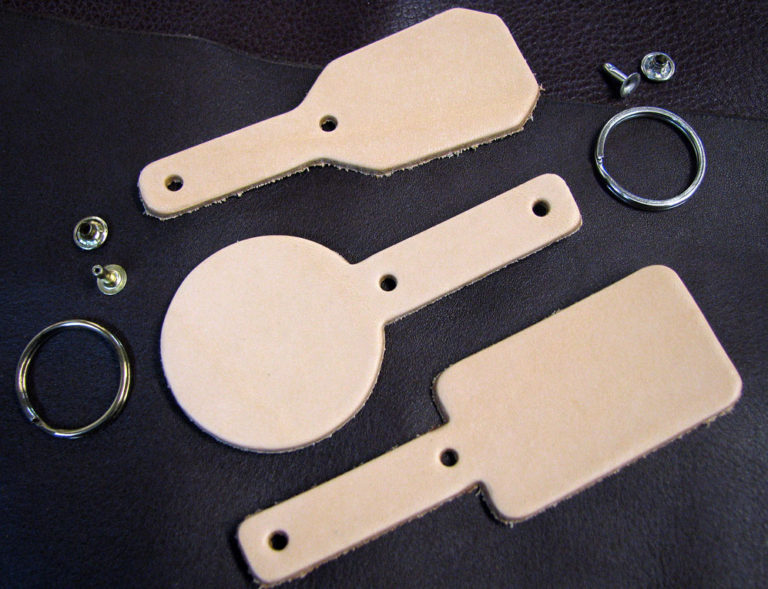
Our standard blank keychain leather shapes, with rings and rapid rivets.
Cut any straight edges first before tackling the corners. When cutting straight edges, I find it easiest to make two passes with my knife. I line up my ruler and drag my utility knife against it, just firmly enough to score the leather. Then I remove the ruler and follow over my first cut, this time applying enough pressure to slice all the way through. Make sure to hold your blade perpendicular to the table when you cut. It's best to have a nylon or rubber cutting pad under the leather.
Cutting on a curve takes some practice. For tight curves, I find it easiest to carve off pieces in a series of tiny cuts until the corner is smooth.
Once your key fob is cut, you can punch the holes for the rivets using a 1/8” drive punch.
Tooling The Leather Key Fob
Now that your blank tag pieces are ready, you can start customizing them.
Creating Stamped Designs:
Wet the surface of your key tag with water on a damp sponge, and line up your leather stamp. Give the stamp a light tap with your mallet, just firmly enough to make a slight imprint on the leather. Then lift the stamp to check that your design is placed correctly and deep enough. If the placement looks good, dampen the leather once more and stamp again to make the impression deeper. It should slide back into the groove you’ve made for it.
Give the stamp a stronger tap and check the result again. If part of the impression is too shallow, you can tilt the stamp to focus the force of the mallet onto just one side or corner. Continue tapping and checking the impression until it is uniform and as deep as you want it to be.
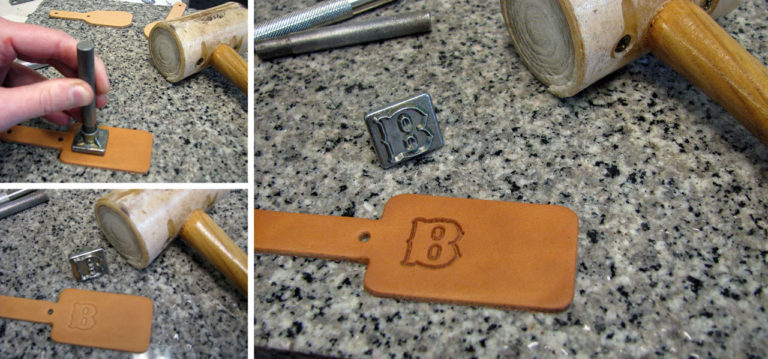
Test your stamp placement by making a light impression. Then replace the stamp and hammer more firmly to deepen the impression on your DIY leather keychains.
If, after your first tap, you find the image appears slightly crooked or off-center, you should be able to adjust it somewhat. When you replace the stamp, twist it into the correct position and hold it there firmly when you tap it again.
You can get as simple or as elaborate as you like with your stamped designs. I could leave the tag as is, with just an initial in it, but I decided to add floral design just to show you some more options. You could also use smaller stamps to add a decorative border to your tag.
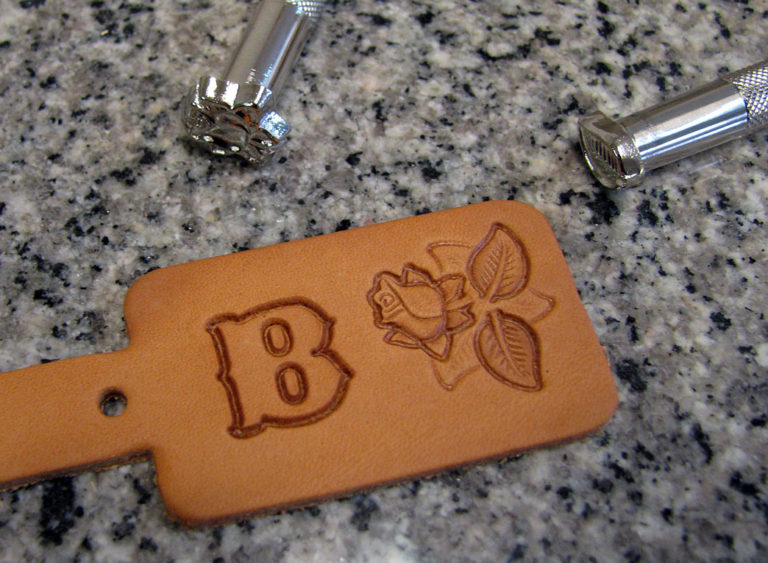
I used a leaf stamp and a rose stamp to create this design.
Creating Etched Designs:
Another option for creating impressions on your tag is to etch them. Etching is a good option if you don’t have any stamping tools, or you can’t find one for the specific design you want. All you need is a ball point stylus, a pencil, and a piece of paper.
First, draw or print the design you want to transfer to your leather. Remember that the tip of your stylus is wider than the point of your pencil, so you don’t want to use a design with fine lines close together or the detail will get lost. For this tag you can see that instead of drawing a whole cat, I’ve used a few lines to give an impression of a cat, which will make the design much clearer when etched.
To transfer your design, dampen the leather with a wet sponge and lay the paper on top of it. Trace over your lines with the pencil. When you lift the paper, you will have an image on your leather.
Wet the leather again and retrace the image, this time with your ball point stylus. You’ll need to press down firmly and keep a steady hand.
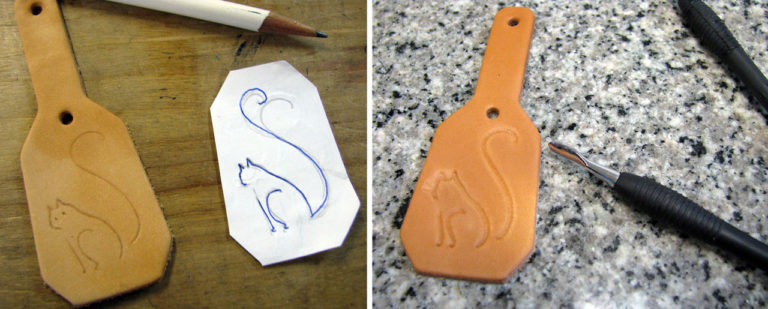
Left: my inital image transfer. Right: my final etched design.
Since the wet leather is malleable, it is somewhat forgiving of mistakes. For this tag I decided the cat would look better without eyes as if the cat is looking away, so when the leather was still wet I used a tool to smooth over that area where I marked the eyes and flatten it out again. You can also use your fingers to smooth wet leather.
Once you’re finished tooling or etching your homemade keychains, wait for them to dry completely before doing anything else with them. You can lightly blow them dry with a hair dryer to speed things up.
Dyeing Your DIY Leather Key Tags
On my stamped key tag, I wanted to dye the body of the tag while leaving the stamped impressions undyed. To do this I applied dye to a folded cotton cloth and wiped it lightly over the surface of the tag. Then I used a Q-Tip to clean up any areas that needed more dye.
If you push down too hard with the rag or Q-Tip, or if they are overly sodden, dye will seep into the impressions. I recommending practicing your dye application technique on a stamped scrap leather piece first.
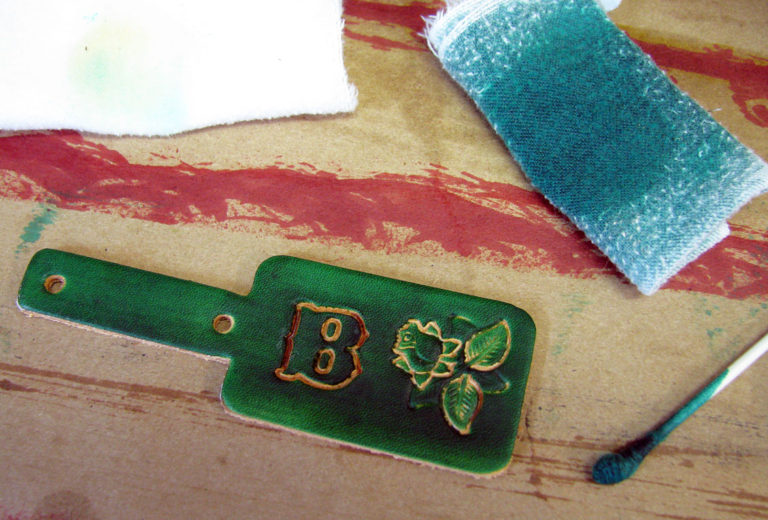
I applied leather dye with a folded cotton cloth and a Q-Tip.
If you want the entire tag dyed one color, impressions and all, you can instead apply the dye with a wool dauber or a piece of sheepskin.
After the tag was dyed, I applied neatsfoot oil which is a leather conditioner, with another cotton rag. This deepens and evens out the color.
For my etched tag, I decided to darken the tag only with neatsfoot oil. I applied the oil with a cotton rag, just as above. You don’t have to be nearly as precise with the neatsfoot oil as you do with the dye.
When the tags are dry, if the color is uneven you can use another cloth or a Q-Tip to add more leather dye or oil where needed.
Polishing Your Homemade Keychains
To polish the key tags using acrylic resolene polish, apply the polish to a folded cloth and wipe it lightly across the tag. If you press down too hard, polish may flood the stamped impression; and if you’re unlucky it may carry some of the color of the dye with it. If you get polish in the impression, use a Q-Tip to dab it out. If there is any discoloration from transfered dye, you can use a tool with a fine point to scrape the inside of the leather impression. We use a dentist tool for this.
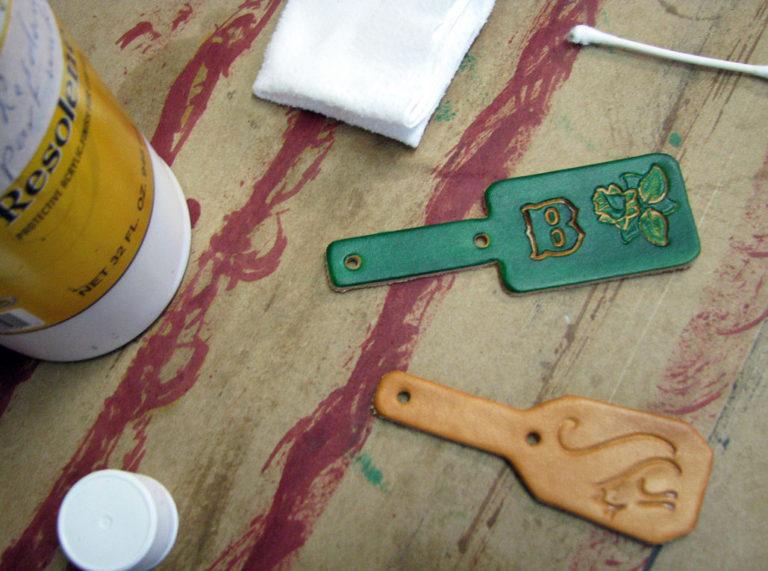
I brushed on a light coat of leather polish with a cotton cloth.
Wait for the polish to dry completely before adding a second coat if you want the leather glossier – about 10 minutes. You can also choose to leave your tag unpolished, for a more rustic look.
Painting Your Cool Keychain
If you’re going to paint your homemade key tags, make sure you find a paint made specifically for leather. Leather paints dry rubbery, so they can bend and flex without flaking off the way an ordinary acrylic paint would. For this project I used edge kote, an acrylic leather dye, to dye the edges of my tags and also to paint the cat design on the etched tag.
To paint the tag edges, I used a sponge brush. This is the quickest way to get an even line and coat the whole edge of the tag. I waited for the paint to dry, and then burnished the edges by rubbing beeswax on them with a cloth.
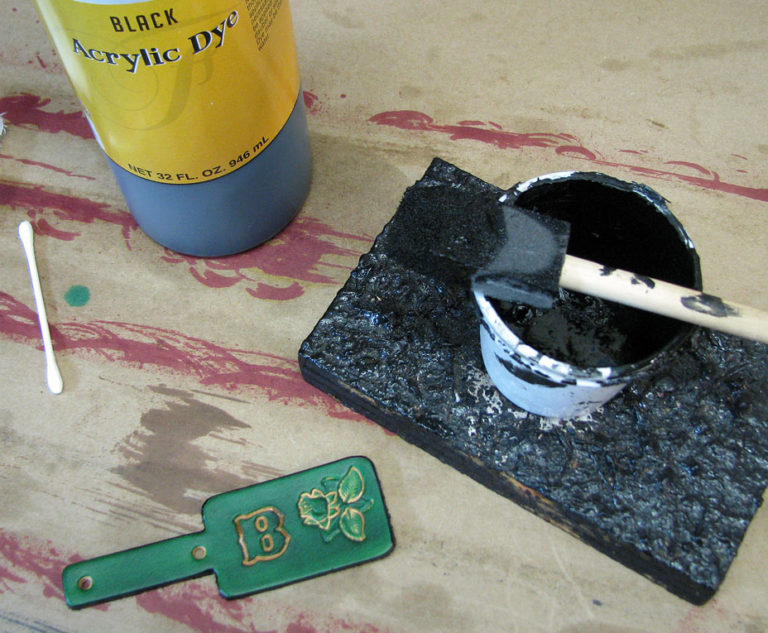
I used a sponge brush to quickly edge dye my key tags.
To paint the etched impression, I used a ball point stylus. You can use the same one you used to create the etching. You can also use a paintbrush, but I find the stylus gives me more control.
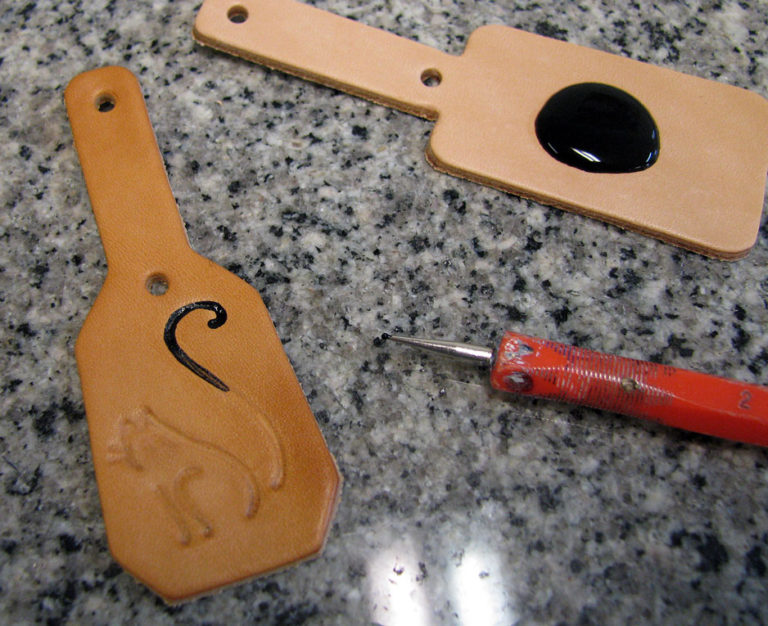
I used a ball point stylus to paint my etched key tag.
You may need to apply two coats of paint, especially if you’ve dyed your tag a dark color and want to paint a lighter color on top of it.
Riveting the Split Rings on your DIY Leather Key Fobs
There are two ways to secure your rivets. On the stamped tag, I used a rivet setting tool to maintain the domed shape of the rivet. Hold the setting tool perpendicular to your anvil, and hammer directly downwards onto it. I usually give it two or three firm blows with the hammer.
If you don't care about preserving the domed shape, you can also set rivets using just a hammer. Hammer straight downward onto the rivet.
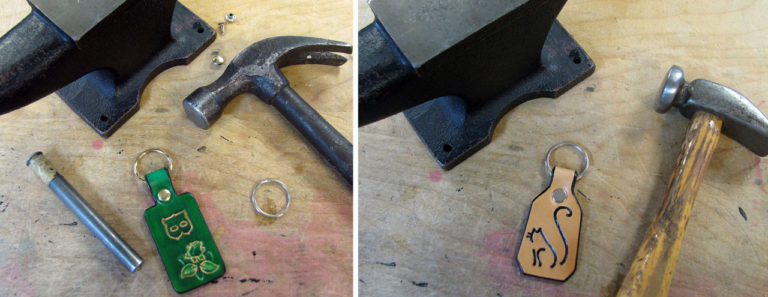
Left Photo: I used a setting tool to maintain the rounded rivet shape. Right: Photo I used a carpenter's hammer to flatten the rivet in the DIY leather keychains.
The Finished Custom Key Fob
Here are my finished key tags, with an assortment of other personalized key rings from around the shop. You can get as simple or as complicated as you want with these DIY leather keychains, from a basic initial to a miniature work of art.
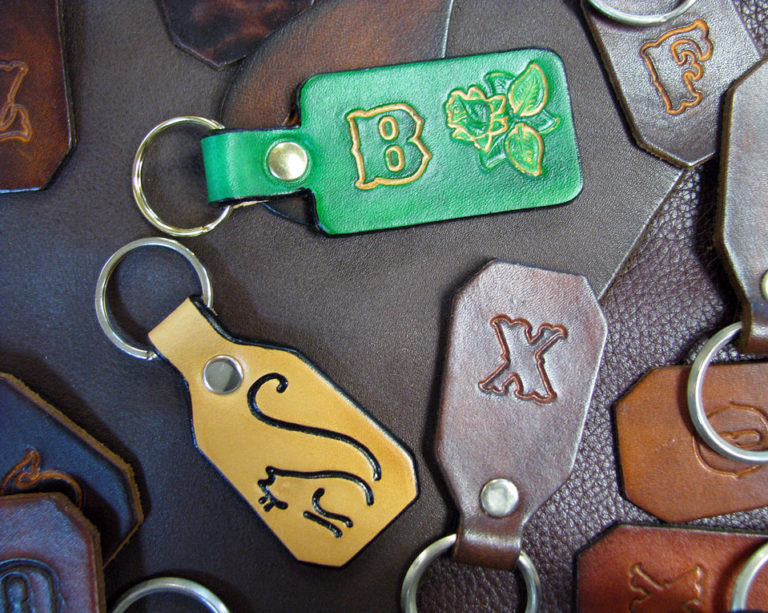
An assortment of finished DIY leather keychains.
DIY key tag making video
If you make key tags using this tutorial, we would love for you to send us pictures to share on facebook!

