
Leather Edge Creaser Tools - Leatherworking Tools
Decorative border lines along the edge of your leather are made with leather edge creaser tools and other leatherworking tools. There are different leatherworking tools that can accomplish beautiful border lines such as the CS Osborne edge creaser, adjustable groover, adjustable edge creaser, leather bone folder, wing divider, and modeling tool (shown in photo below in order from left to right). We will discuss and show how to crease leather with these tools as well as their other uses.
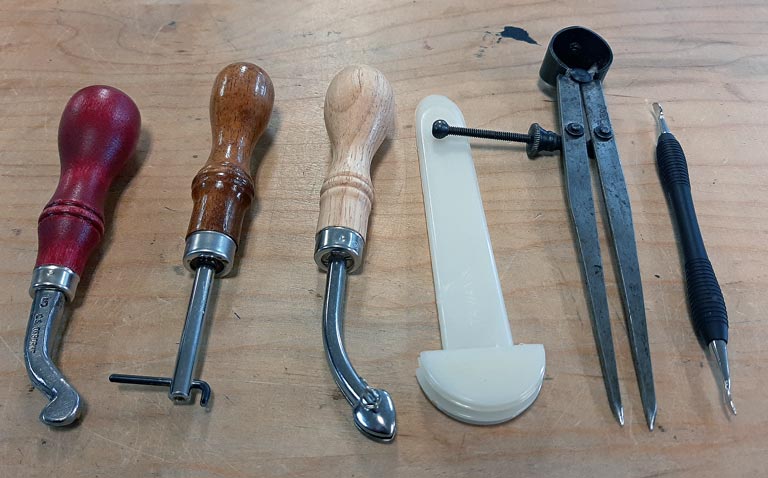
Various leatherworking tools for making decorative border lines along the edge of your leather.
Crease lines are long lasting when put in undyed vegetable tanned tooling leather. First dampen the grain side of the leather (top side only) with water using a sponge. When your leather creasing tool makes the decorative line in the leather, it will remain permanent once the leather dries.
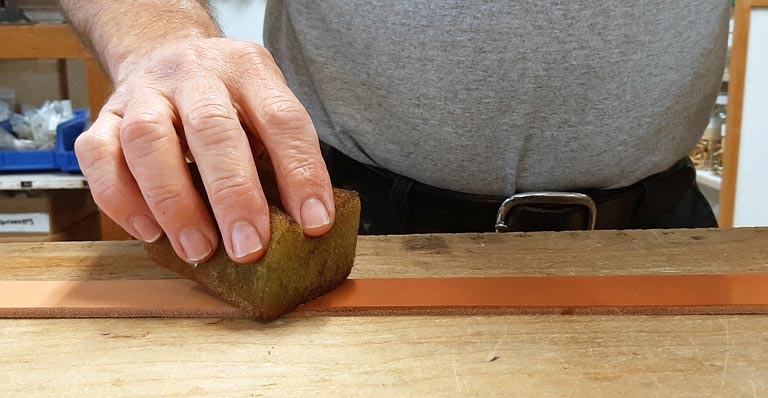
Wetting undyed vegetable tanned tooling leather with water.
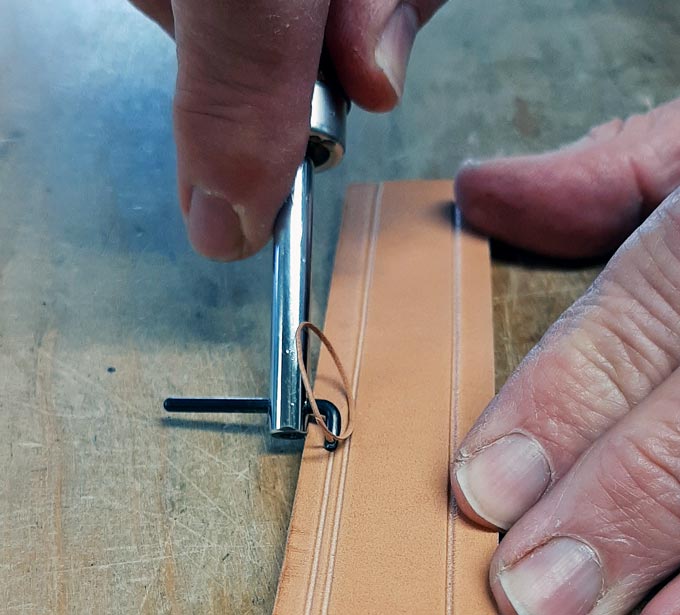
C.S. Osborne Creaser
For approximately two hundred years, the CS Osborne tool company has been manufacturing quality leatherwork tools. Made in USA, this C.S. Osborne creaser is a favorite among many leatherworkers. It not only makes a beautiful crease line, but it also rounds the sharp corners of the leather, so you do not have to bevel. The end of the beveler is concave so it rounds the edge at the same time.
First dampen the top of your tooling leather with water. Hold the edge creaser tool perpendicular to your leather with one foot against the edge of the leather. Apply downward pressure on the Osborne tool as you push forward. If you want the crease line deeper, just go over it a second time.
These leather edge creaser tools by C.S. Osborne come in varied sizes such as #1, #2, #3, #4, and #5. The larger the number, the further the impression line will be from the edge. These CS Osborne leather tools have such small variations in distances that any size will look great on your leather strap. However, if you are only buying one size you may want to start with a #4 or #5. The smallest number is about one-sixteenth inch from the edge and the #5 is about one-eighth inch from the edge. You can see the #5 C.S. Osborne creaser being used in the photo below.

The #5 C.S. Osborne Creaser making a decorative crease line.
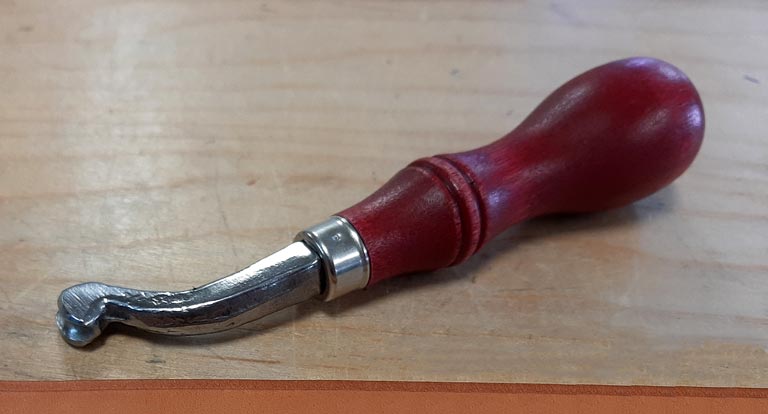
The C.S. Osborne Creaser tool has a concave end that also rounds the corner edge of the leather.
CS Osborne Creaser tool instructions for making decorative border lines in this video.
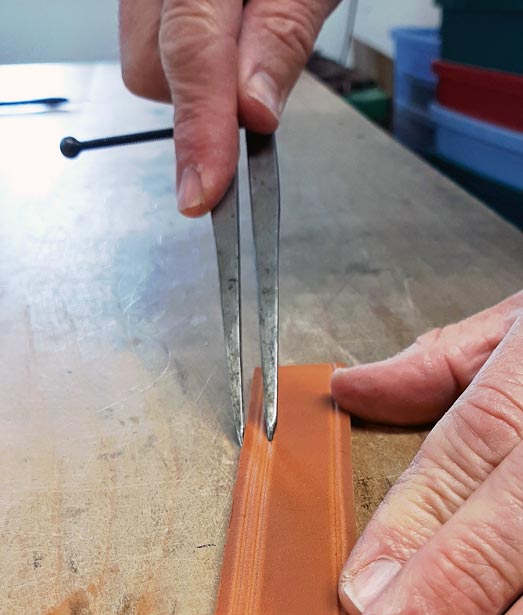
Adjustable Leather Creaser
The adjustable creaser tool has a thumb screw for adjusting how far the crease line will be from the edge of your leather. This creaser adjusts up to five-sixteenth inches wide which gives you ample room for multiple distances from the leather edge. To get a nice permanent decorative crease line, damper your tooling leather with water. Simply put one foot against the leather edge and push down as you follow the edge. I like to hold the adjustable leather edge creasing tool the way shown in the picture below, but you can flip the tool over and use it this way as well.
You can even put a second line along the edge for a neat decorative effect for leather goods such as belts. Another neat design effect can be achieved by running an overstitcher tool along the crease line to give a stitched look.
This leather tool is often used for making a guideline for your hand stitching or lacing to follow with your space marker, pricking chisel, diamond chisel, or lacing chisel. For guidelines, it is not necessary to dampen the leather with water. The adjustable leather creaser is an extremely useful leatherworking tool for your shop.
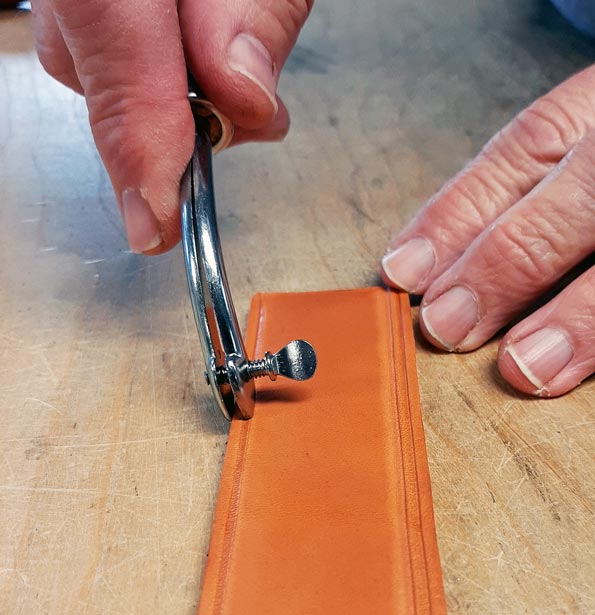
The Adjustable Creaser tool makes decorative border lines and guidelines.
Leathercraft tutorial video demonstrating the adjustable leather edge creasing tool.
Nylon Bone Folder Tool
This leather tool has multiple uses. The nylon bone folder tool works fantastic for shaping and molding leather around a form or for making a nice tight fold in the leather. The half moon end of the leather bone folder is concave so it can also do some edge slicking although we find a circle edge slicker easier to use.
If you already own this bone folder tool, the half moon section can also make decorative crease lines along the edge of your leather. However, we find the C.S. Osborne Creaser and the adjustable leather creaser tool mentioned previously to be much easier to use for doing leather edge creasing.
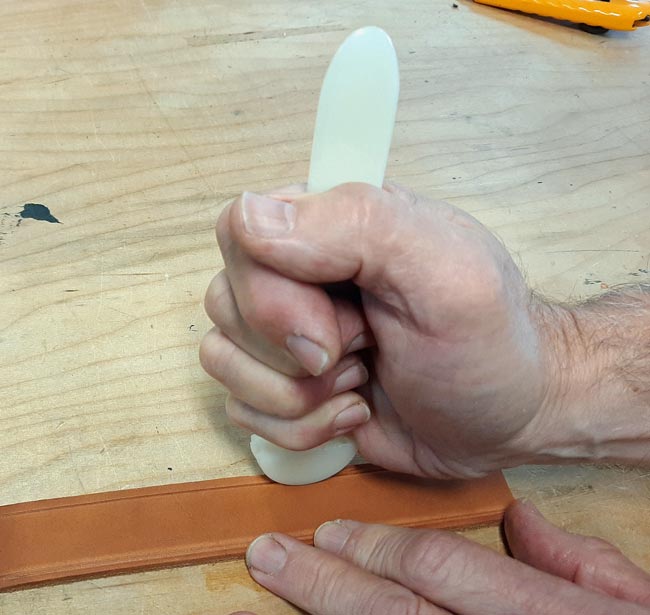
Nylon Bone Folder making decorative cease lines in a leather belt.
Leatherworking tutorial video on the multiple uses of the Nylon Bone Folder tool.
Wing Divider Tool
The leather wing divider also can make decorative crease lines. Simply dampen your tooling leather with water and run the tool along the edge. For effect you can adjust it wider to make a double border line. If you want, you can take a spoon shaped modeling tool and run it along the outer edge of the line to make a bevel. This gives the appearance of the center looking raised.
The wing divider is a great tool for your leather shop. Mark stitching lines with wing dividers. It is easy to make a guideline running parallel to your leather edge. For making guidelines, it is not necessary to dampen the top of your leather with water. You can follow the line with your sewing and lacing chisels. You can also run your CS Osborne space marker tool along the guideline for your stitch location when using a sewing awl.
You can also make guidelines for where you want to cut the leather. With a large adjustment variation of six inches, this is a very versatile tool. In our own leather shop this wing divider tool is used everyday.
Leather Wing Divider Tool making guidelines and decorative border lines.

Modeling tool making a bevel along the side of the line created by the wing divider tool.
Leathercraft video demonstrating what a wing divider is used for.
Adjustable Groover Tool
The adjustable leather groover tool cuts a groove along the edge of your leather piece. This groove can be decorative for making single or double border lines. The space between the edge of the leather and the groove can be adjusted easily by loosening the set screw at the end of the tool to move the blade further or closer to the shaft of the tool. The distance can adjust approximately from one-sixteenth to three-quarter of an inch.
To use, simply butt the shaft against the edge of your leather and pull the tool along the edge of the leather while applying a gentle downward pressure on the blade. Unlike the other tools mentioned in this blog, the leather is not dampened with water to use the adjustable groover tool.
The adjustable stitching groover is also used to make a trench to inset your waxed hand thread. This groove makes an easy guide to follow with your stitch marking tools. The groove allows the stitching to line up neatly and makes the stitch last longer since the thread sits below the surface of the leather. By sitting below the surface of the leather, the thread is not susceptible to wear if the leather is scuffed.
Adjustable Groover tool making decorative double border line and groove for stitching.
The Adjustable Groover Leather Craft Tool demonstrated in this video.
Beautiful Handmade Leather Belts
Decorative bevel lines and groove lines can dress up any of your leather projects. If you want to add a bit of decoration to a belt, the leatherworking tools mentioned provide a quick and easy way to accent the leather belt you are making. The border lines create a tasteful subtle design on your full grain leather belts that you create. Enjoy using the many leather tools that are available for today's leather artisans.

The CS Osborne Creaser tool made decorative border lines on this full grain leather belt.
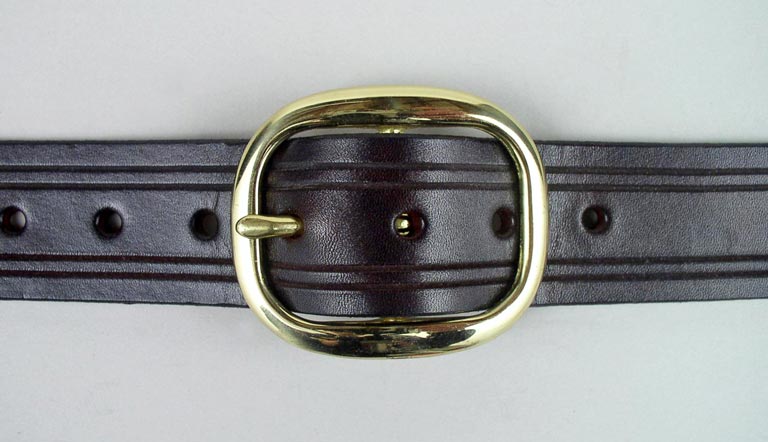
The adjustable groover tool made the decorative border lines in this handmade leather belt.


